

Replacing a boiler can feel like a black box process if you’ve never been through it before: someone turns up, does something for a day or two, and you end up with hot water again. Knowing what should actually happen at each stage helps you spot a thorough installer from a rushed one, and makes sure you’re not paying for corners that got cut. Here’s what a proper boiler installation looks like from first phone call to final handover, based on how we run the process across Nottingham, Beeston, Stapleford, West Bridgford and Long Eaton.
A proper installation starts with an engineer visiting your property, not just quoting over the phone. They should assess the size of your home, look at your existing setup and any performance issues you’ve had, and talk through your household’s hot water and heating needs, including whether that’s likely to change in future. This is also when a heat loss calculation should be done to work out the correct boiler size in kW, rather than simply matching whatever was there before.
Based on that assessment, you’ll be looking at one of three system types. Combi boilers suit smaller properties with one bathroom and provide hot water on demand without needing a tank or cylinder. System boilers suit homes with two or more bathrooms, using a separate cylinder to store hot water so several taps can run at once. Regular, or conventional, boilers are mostly used in older homes that already have a loft tank and cylinder in place. Your installer should also confirm the boiler meets Boiler Plus requirements if you’re in England, which means a minimum efficiency rating plus at least one extra control such as a smart thermostat, this is a legal requirement for new gas boiler installations, not just an optional upgrade.
A proper quote should clearly break down the make and model of the boiler, labour costs, and any extras such as a magnetic filter, flue work, upgraded controls, or condensate pipe work, along with warranty terms and whether VAT is included. As a general guide, a straightforward combi installation in the UK typically costs from around £1,800 to £3,500, while a system boiler installation including a cylinder tends to run from about £2,500 to £5,000, though your actual price depends on your property and whether you’re switching system types. It’s worth getting two or three quotes to compare, and being cautious of anything unusually cheap, it may simply be missing items that get added on later.
On installation day, your old boiler is safely disconnected, with the gas and water supplies isolated correctly throughout. If you’re switching system types, this is also when old tanks, cylinders or redundant pipework get removed. In older properties, particularly anything built before 2000, a good installer should also check whether asbestos is present in old flues, boiler casings, or nearby boarding before disturbing anything, rather than assuming it isn’t.
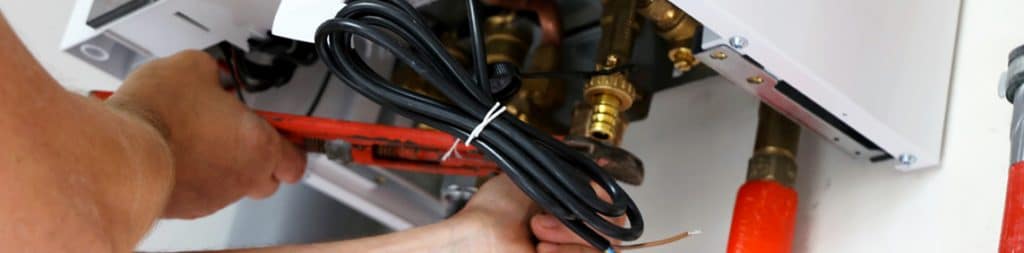
The new boiler is fitted along with its flue, positioned to meet the manufacturer’s clearance requirements and Gas Safe guidelines, and connected to your pipework and controls. A magnetic filter should be fitted on the system return pipe close to the boiler, this is required under British Standard BS 7593:2019 and is a genuine warranty condition on many current boiler ranges, not an optional extra. The condensate pipe should be routed internally where possible, since pipes run externally are far more prone to freezing in cold weather, and any external section needs to be a wider bore pipe with proper weatherproof insulation.
Once everything is connected, the system should be flushed to clear out any old sludge, debris or flux residue, followed by dosing the system with a chemical inhibitor to protect against future corrosion and limescale build-up. Skipping this step is one of the most common reasons a brand new boiler starts underperforming within its first year or two, since it’s effectively running on a dirty system from day one.
Before anyone calls the job finished, your engineer needs to test water pressure and flow, check for leaks, confirm the flue is operating safely, and make sure all safety devices and controls are working correctly. This should be recorded on the boiler’s Benchmark commissioning checklist, found in the installation instructions, which confirms the system has been installed and set up correctly. Most manufacturers treat a completed Benchmark checklist as a condition of the warranty, so it’s worth asking to see it rather than assuming it’s been filled in.
Your installer should register the new boiler with the manufacturer, usually within 30 days, to activate the full warranty period, which can otherwise drop back to as little as 12 months if missed. As a Gas Safe registered installer, they should also self-certify the work under the Competent Person Scheme and notify your local council, so you receive a Building Regulations compliance certificate, something you’ll need if you ever sell the property. You should leave the job with a clear explanation of your new controls, along with guidance on booking your first annual service.
Upgrading your home’s central heating system is one of the most effective ways to improve comfort, energy efficiency and property value. Whether your current setup is outdated or no longer working reliably, knowing what to expect from the replacement process can help you plan with confidence. With skilled heating specialists working across Nottingham, Beeston, Stapleford, West Bridgford and Long Eaton, we’re here to walk you through each step of a professional boiler upgrade.
Every successful heating system upgrade starts with a proper home evaluation. A certified technician will visit your property to:
Based on this, they’ll recommend the most suitable unit for your household – whether that’s a combi boiler for efficiency or a system boiler for higher demand.
There are several options when it comes to modern boilers. Your engineer will help you decide based on budget, home size and usage:
Each type has its pros and cons, and your heating contractor will ensure you get a model that matches your home and lifestyle.
After assessing your needs, you’ll be provided with a detailed quotation. This will include:
Quotes are typically no-obligation, giving you the chance to consider your options.
On the day of installation, your old unit will be safely disconnected and removed. Your installer will follow all safety regulations, ensuring gas and water supplies are managed correctly. This part of the process may also include removing old tanks or unused pipework.
Your new boiler will be fitted, and all necessary pipework and controls will be connected. Depending on the complexity, installation can take from one to three days. Modern systems often include smart heating controls, which can be set up at the same time.
Your engineer will also flush and clean the system to remove any debris or build-up, helping your new boiler run as efficiently as possible from day one.
Once installed, your heating engineer will test the system thoroughly to make sure it’s working correctly. This includes:
You’ll receive a full handover with instructions, documentation, and information about ongoing maintenance.
Your installer will register your boiler with the manufacturer to activate your warranty, and with Gas Safe (if applicable) for legal certification. You’ll also be advised on recommended servicing and aftercare to extend the life of your new system.
When replacing your boiler, it’s essential to work with a fully qualified gas engineer or plumbing expert. A poorly installed unit can lead to safety issues, lower performance and higher bills. Local, accredited professionals ensure the job is done right the first time, keeping your home safe and warm.
If you’re considering replacing your boiler and want guidance from a reliable local team, we’re here to help. We work across Nottingham and surrounding areas, providing honest advice, high-quality installation and transparent pricing.
Whether you’re upgrading an old heating system or fitting one in a new property, contact us today for a quote or home assessment. Our qualified engineers and plumbing technicians will help you choose the right setup for your needs and ensure a smooth, professional installation from start to finish.
Your new heating system is just a phone call away.